


Recently I taught a weaving class at an assisted living center with a delightful group of women, the oldest being 90 years old! My training as an occupational therapist provided some foundation on adapting the weaving project for individuals with some limitations as to memory, vision, and gross and fine motor skills. I always like to focus on the 3 P’s when I work with seniors: the person, the process and the product. The person should be interested in being an active participant and thus be in control of creating his/her own work. The process should be somewhat repetitive and yet hold the interest of the creator by employing colorful and tactile materials. The process should also guarantee that the person succeeds at it. And finally the product should be attractive and finished in a way that it can be displayed or given as a gift. Using this methodology, young children and adults with physical or developmental disabilities could also benefit from such a project.
However, this means that a lot of preparation is required by the instructor. For art teachers or others interested in this activity, weaving on mat board looms, I am sharing a brief tutorial on preparing the looms. Teachers with students who are able to do so can also have their students make their own mat board looms in advance of the weaving.
Materials Needed
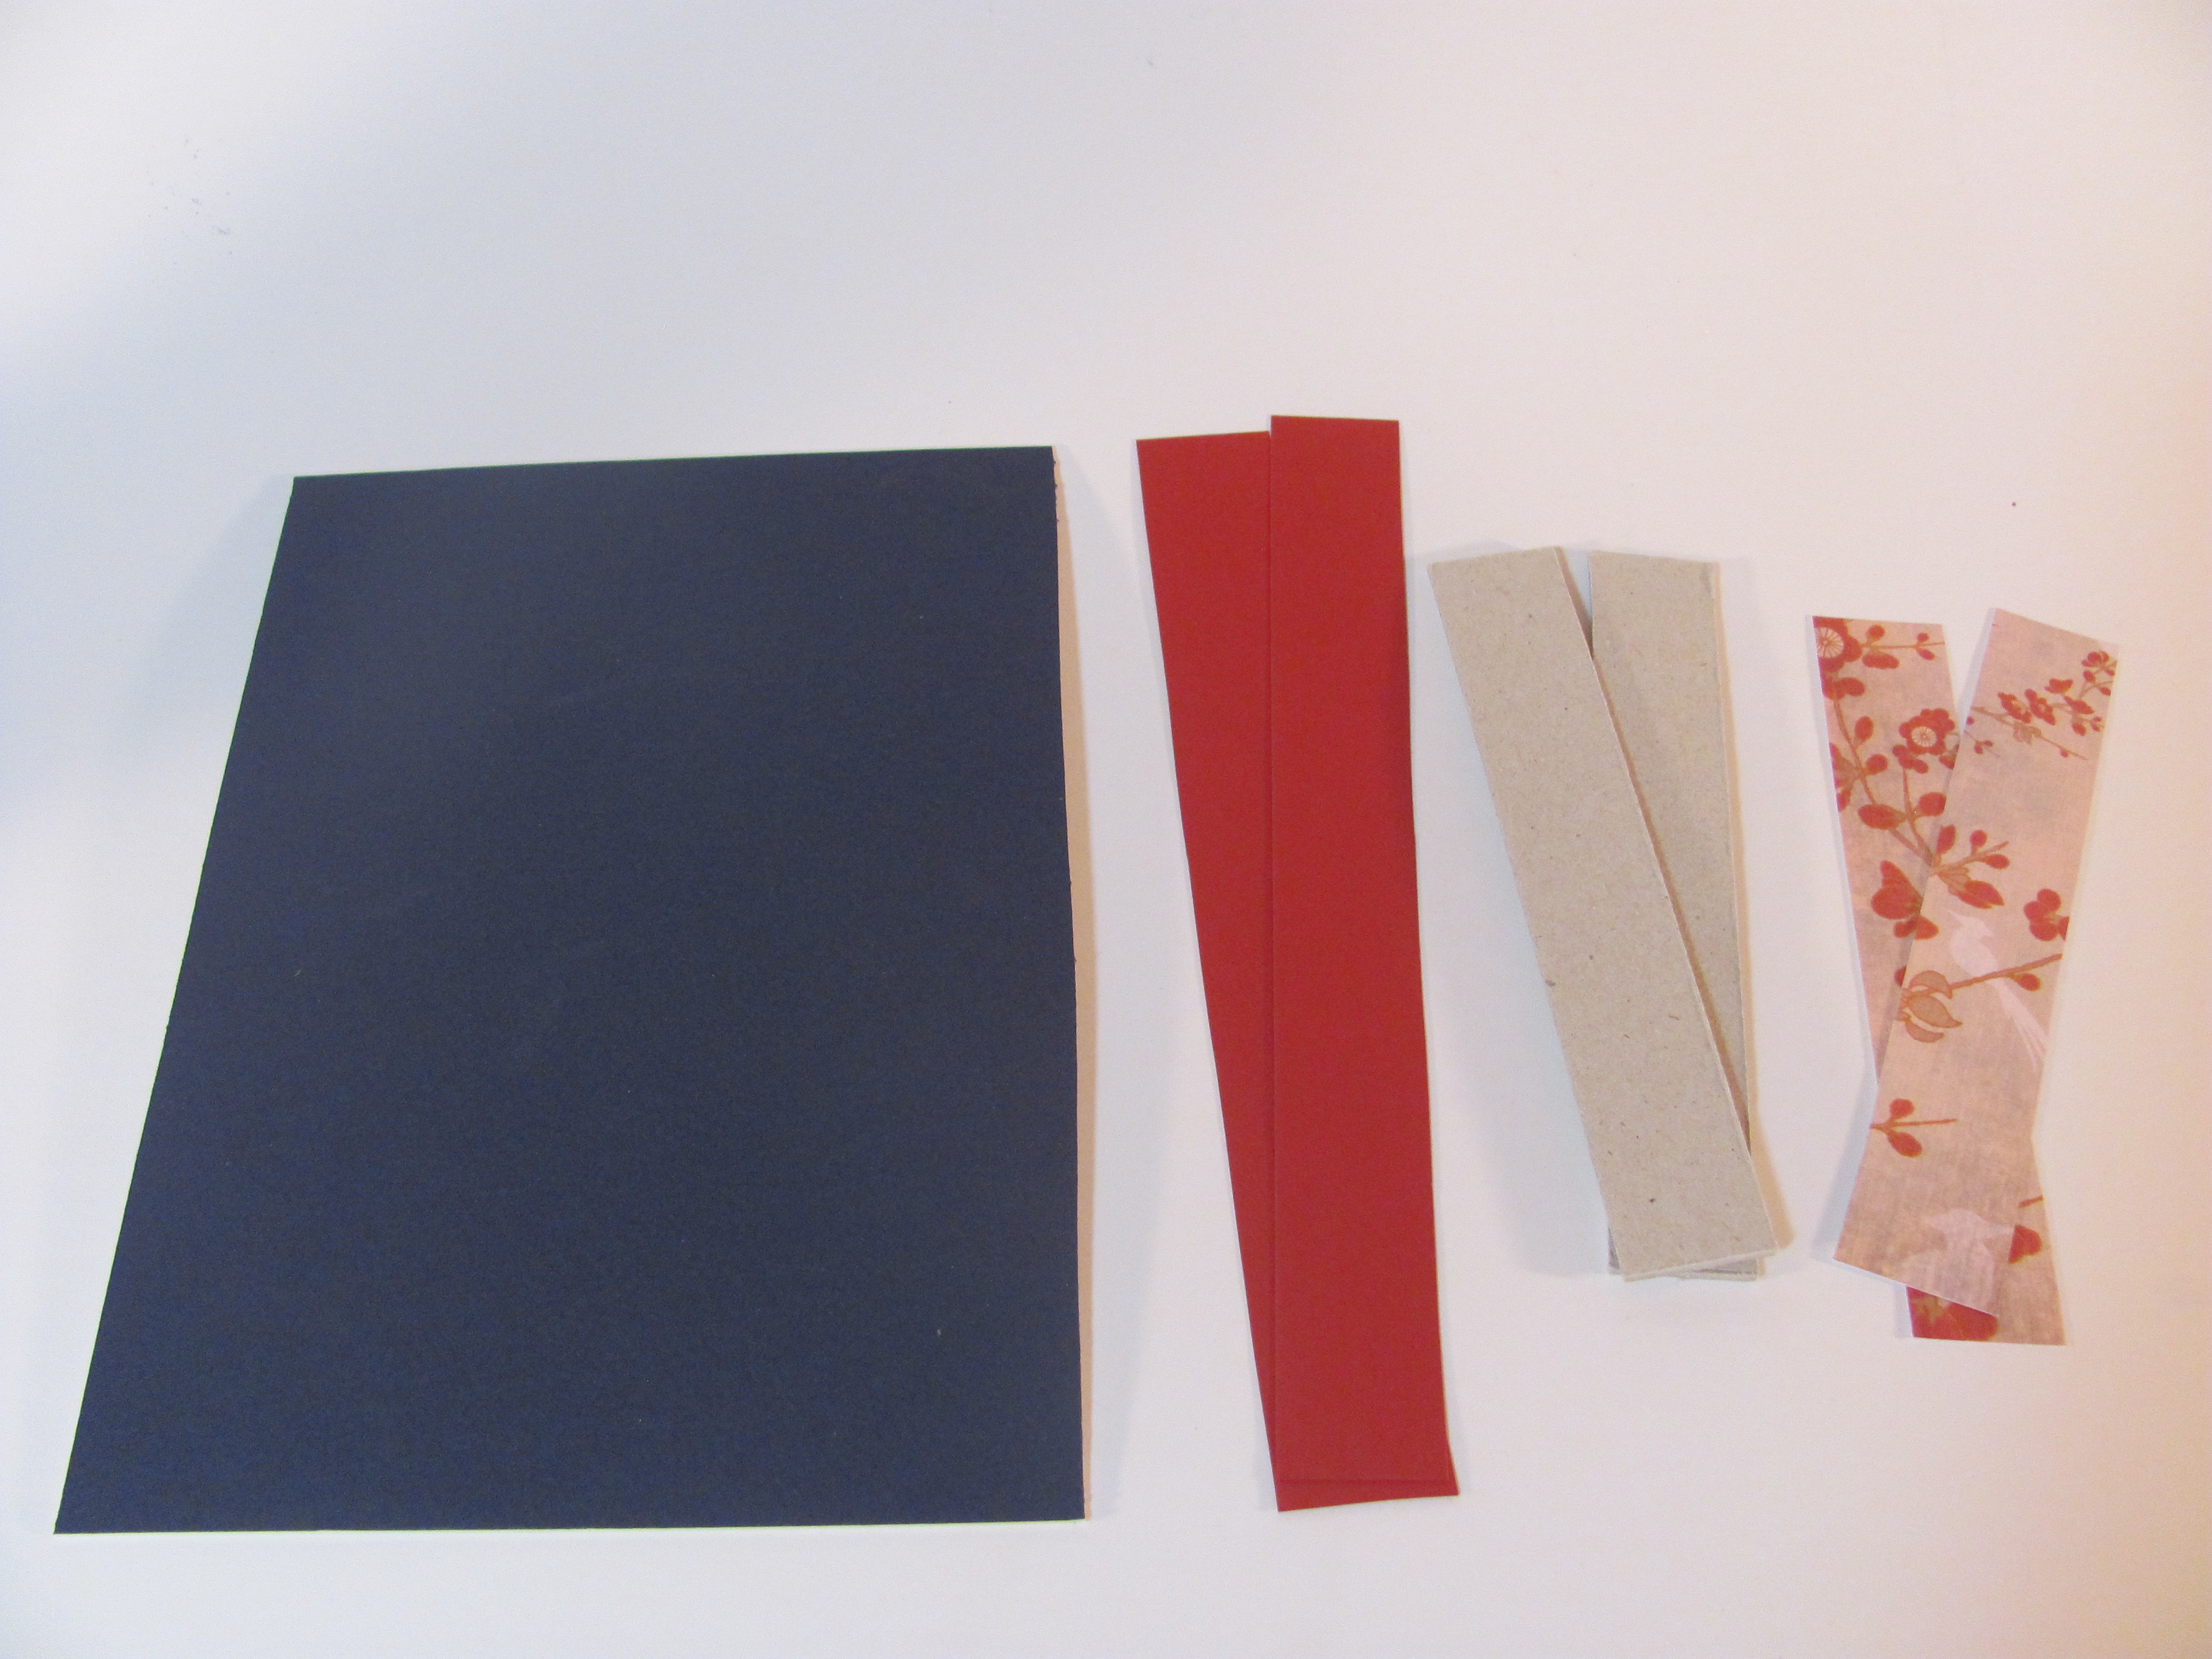 Mat board cut to 6″ W X 9″ H
2 pieces decorative card stock measuring 1″ W X 9″ H
2 pieces heavy cardboard measuring 1″ W X 6″ H**
**I used book board for this, illustration board can also be used
2 pieces decorative card stock measuring 1″ W X 6″ H
Glue Stick
Discarded piece of mat board measuring 1″ W X 6″ H
Pencil and ruler
Small drill or awl
Tapestry needle
Strong yarn for warp, such as cotton carpet warp or perle cotton
Picture frame hook (optional)
Assembly Instructions
With a glue stick, glue the 1″ X 9″ decorative card stock to the long edges of the mat board. Then glue the 2 pieces of heavy cardboard onto the top and bottom short edges of the mat board. Lastly, glue the shorter pieces of decorative card stock onto the heavy cardboard.

Now make a template from a piece of discarded mat board measuring 1″ X 6″. Mark and measure a 4″ length in the center of the template. Within this marked section, find the lengthwise halfway point and with a ruler draw a straight line from one end of this 4″ section to the other end. This line will be your guide to make evenly spaced holes across the template. The holes in my loom are roughly spaced 1/4″ apart for a total of 17 holes. I used a small drill like a Dremel stylus to make the holes, but an awl would work just as well.

Next position the template on top of the bottom edge of the loom and carefully following the holes of the template use an awl or other sharp tool to pierce corresponding holes through both the heavy cardboard and the mat board. Do the same for the top edge of the loom.
Warping the Loom
Measure a 4 1/2 yard length of strong warping yarn such as cotton carpet warp or perle cotton. With a tapestry needle, thread the yarn through the holes that you just pierced on the bottom and top edges of the loom. The front of the loom should look like this:

The back of the loom should look like this:

Note that the warp threads are threaded in a vertical direction only at the front of the loom. On the back of the loom, the warp threads are threaded horizontally through consecutive holes. This will prevent the mat board from curving toward the front during the weaving process. A picture frame hook can be glued to the top of the loom if desired.
Now you are ready to weave. I use thick and colorful textured yarn threaded through a wooden weaving needle. A long plastic needle with a large eye will work just as well. A strong comb or pick is used to “beat” each row of weaving.

The classes at the assisted living center were sponsored by Creative Aging Midsouth. Miss Eula was one of the participants in the class. Here she is with her finished weaving project. This lovely lady celebrated her 90th birthday during the course of the class!

Filed under: Aging, Memphis, Weaving | Tagged: art teachers, loom, making a mat board loom, mat board loom, tutorial, Weaving |

Leave a comment